All About Suppository Molds
and Packaging
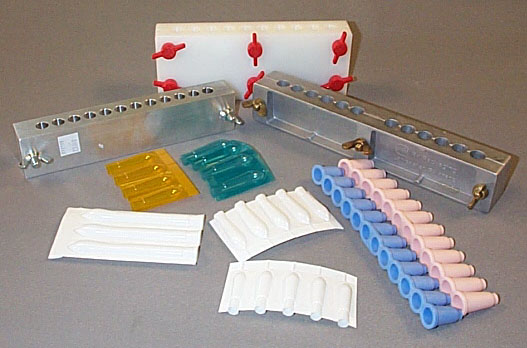
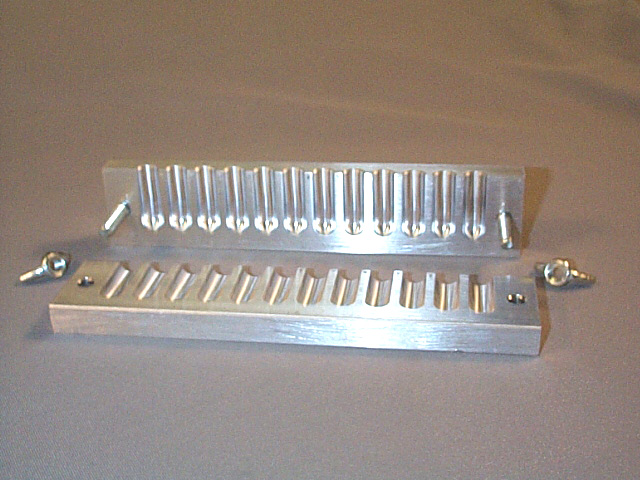
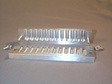 Aluminum
metal molds come in a variety of cavity sizes and with a variety of number of
cavities per mold. Common sizes vary from 1 g to 2.5 g, and common number of
cavities range from 6 cavities up to 100 cavities. The two halves of the mold
are held together with either nuts or some molds have 1 centered screw.
Aluminum
metal molds come in a variety of cavity sizes and with a variety of number of
cavities per mold. Common sizes vary from 1 g to 2.5 g, and common number of
cavities range from 6 cavities up to 100 cavities. The two halves of the mold
are held together with either nuts or some molds have 1 centered screw.
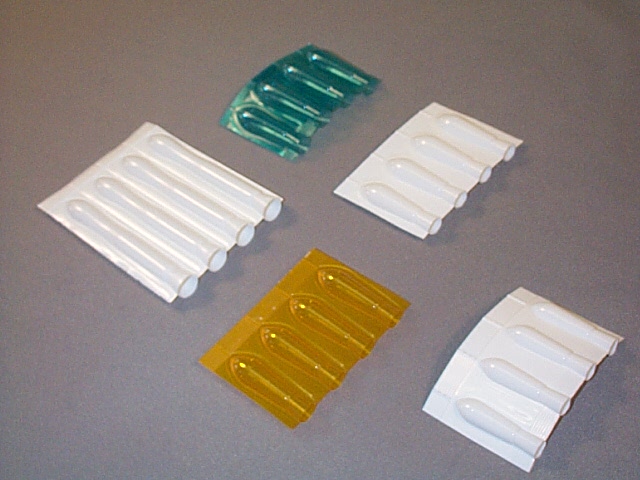
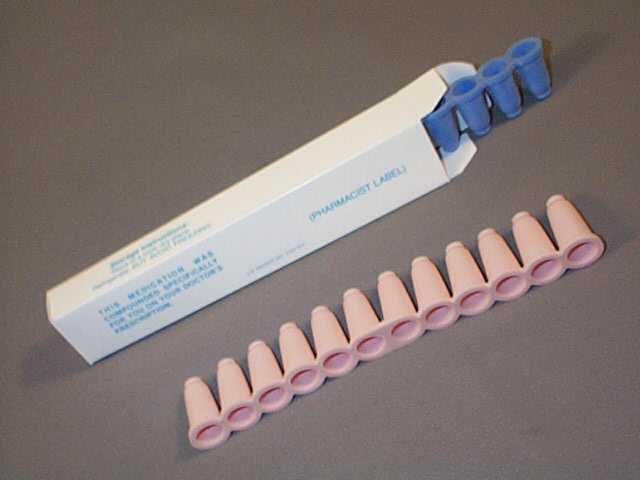
 Plastic
suppository shells come in long strips that can be torn into any number of cavities.
The suppository mixture is poured directly into the shell up to a mark. These
disposable molds do not need any lubrication regardless of the suppository mixture.
When the mixture has hardened, the plastic mold is heat sealed. When a patient
is ready to use a suppository, they select one shell and peel the sides of the
shell off to obtain the suppository. One advantage of this type of mold is that
if the suppository should melt, it will not run out of the mold. If the material
can ongeals again, it will retain the suppository shape. This type of mold is
available in 1 g to 5 g sizes, and many different colors.
Plastic
suppository shells come in long strips that can be torn into any number of cavities.
The suppository mixture is poured directly into the shell up to a mark. These
disposable molds do not need any lubrication regardless of the suppository mixture.
When the mixture has hardened, the plastic mold is heat sealed. When a patient
is ready to use a suppository, they select one shell and peel the sides of the
shell off to obtain the suppository. One advantage of this type of mold is that
if the suppository should melt, it will not run out of the mold. If the material
can ongeals again, it will retain the suppository shape. This type of mold is
available in 1 g to 5 g sizes, and many different colors.
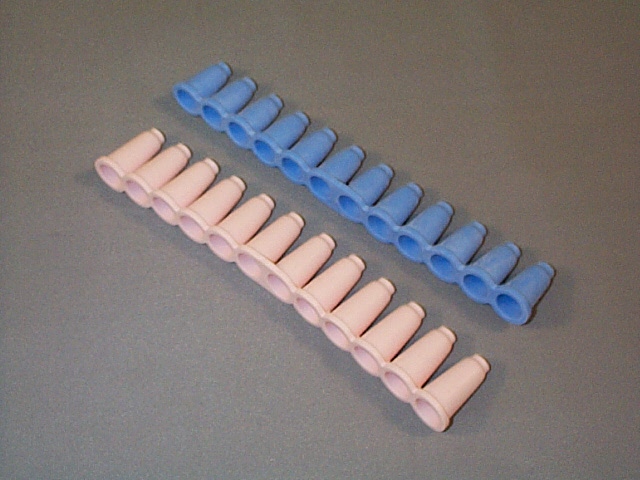
 There are also suppository molds made from flexible rubber. When the suppository
mixture has congealed in these molds, the finished suppositories are "pushed"
out of each cavity. If the prescription does not require all of the cavities
in the strip, it can be trimmed with scissors. These flexible rubber molds are
ideal if the suppositories need to be refrigerated (shells also are suitable
for this purpose).
There are also suppository molds made from flexible rubber. When the suppository
mixture has congealed in these molds, the finished suppositories are "pushed"
out of each cavity. If the prescription does not require all of the cavities
in the strip, it can be trimmed with scissors. These flexible rubber molds are
ideal if the suppositories need to be refrigerated (shells also are suitable
for this purpose).
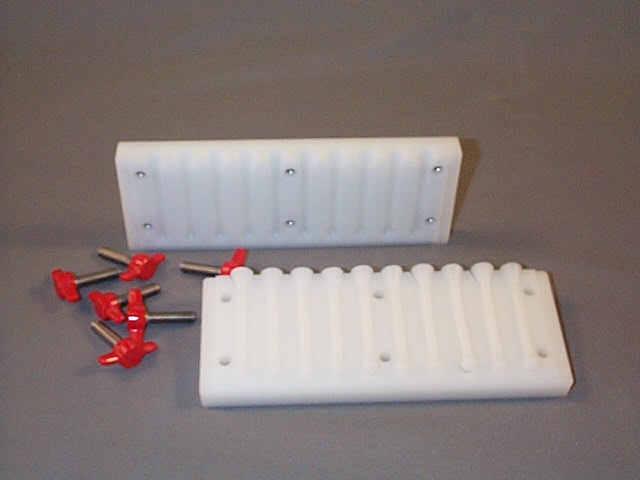
 Very
hard rubber molds are similar to the metal molds in that they have screws to
hold the mold together. When the suppository mixture has congealed, the screws
loosened, and the suppositories are removed. This photograph is a picture of
an urethral mold. If you enlarge the image, you can see PEG suppositories in
one side of the mold. Such thin suppositories require a great deal of investigation
to get the desired consistency and strength. If the suppositories are too soft,
it is very difficult to remove them from the mold. This particular casting had
70% PEG 3350 and 30% PEG 400.
Very
hard rubber molds are similar to the metal molds in that they have screws to
hold the mold together. When the suppository mixture has congealed, the screws
loosened, and the suppositories are removed. This photograph is a picture of
an urethral mold. If you enlarge the image, you can see PEG suppositories in
one side of the mold. Such thin suppositories require a great deal of investigation
to get the desired consistency and strength. If the suppositories are too soft,
it is very difficult to remove them from the mold. This particular casting had
70% PEG 3350 and 30% PEG 400.
Pouring and Opening Suppository Molds
Molds should be filled only when they are at room temperature. A cold or frozen
mold should never be used because it can cause fractures and fissures throughout
the suppository. Each cavity should be filled slowly and carefully ensuring
that no air bubbles are entrapped in the cavity. To prevent layering in the
suppositories, the pouring process should not be stopped until all the cavities
have been filled. Molds should be allowed to set at room temperature. Refrigeration
should only be used if the suppository has not congealed after 30 to 40 minutes.
Aluminum molds usually require lubrication before use. Hard rubber molds may
require lubrication. One way is to use a vegetable oil spray. Other lubricants
include light mineral oil when water soluble bases are being used and glycerin
or propylene glycol when oleaginous bases are being used. Whatever lubricant
is used, only a light coating is needed. If too much lubricant is used, the
excess will pool in the tip of the suppository cavity. Any excess lubricant
should be wiped off with an absorbant tissue such as a Kimwipe.
When suppository mixtures and bases cool, they contract. Some mixtures and
bases have very pronounced contractions (e.g., cocoa butter, PEG) while others
have much smaller ones (e.g., glycerinated gelatin, MBK®). This contraction
will produce a hole in the open end of the suppository. Such a hole is undesirable.
If the suppository mixture is poured just immediately
before it reaches its congealing temperature, the contraction will be
minimized. It is also helpful to pour a small excess of the suppository mixture
on top of the open end of the mold.
When filling a suppository mold, start pouring the melt at one end and pour
continuously without stopping. Don't go to the next cavity until the previous
cavity is filled and a slight excess has been poured to overfill the cavity.
Excess base can be removed once the suppositories have congealed by trimming
the top of the mold with a warm stainless steel spatula.
Suppositories shells are generally poured using a back light to help visualize
the mark on the shell. Some molds (depending on the size or type of the suppository)
cannot be poured, but the mixture is added using a syringe.
Examples of each of these pouring (or filling techniques) are given.
When
the suppository mixture has congealed, the excess mass is removed from the top
surface of the mold and the mold is separated into the two halves. An efficient
way to separate the mold is to remove the wing nuts or loosen the centered screw
and place the mold so that the posts rest on the table top. Then apply a downward
pressure only on the bottom half of the mold. A knife or spatula should not
be used to pry the two halves apart. This will damage the matching mold faces
which have been accurately machined to give a tight seal. (See Opening a Mold)
Suppository shells can be opened by peeling the halves apart if this type
of shell is used. There are suppository shells that do not peel apart at the
bottom but must be torned along its edge. These are very difficult to open,
and should not be used.

View a video demonstration on using a metal
suppository mold
Suppositories
that are not in a plastic shell mold or flexible rubber mold should be wrapped
before they are dispensed. This will provide protection for the suppository
and limit any oil staining that might occur from the materials contained in
the suppository base.
 Once
the suppositories are wrapped, they are generally placed in a special box that
has dividers for each suppository.
Once
the suppositories are wrapped, they are generally placed in a special box that
has dividers for each suppository.
 Flexible
rubber molds can be packaged with the suppository still in the mold. Generally
the mold is placed in a special box.
Flexible
rubber molds can be packaged with the suppository still in the mold. Generally
the mold is placed in a special box.
Plastic shell molds must be heat-sealed. Heat
sealing is generally a two step process. First the open end of the shell is
"shrunk" with the aid of heat. A hair dryer (at highest hot setting)
is capable of providing enough heat to shrink the plastic. There are labatory
type hot air "guns" that also can be used. The heat will cause the
two sides of the opening to collapse together and begin to seal the opening.
The second step is to use an electric sealer to completely seal the opening.
View a video demonstration on filling and
heat-sealing suppository shells